Friday, January 29, 2010

Jan 29th...Snow! And more concrete stain...

The snow was so beautiful today that I had to take some pictures and share them.


We worked on the floors again today and decided that they need some more color. So, we applied another coat of stain after we cleaned the residue from the first layer off. Here's some progression pictures:
Just sprayed / Dried with residue / Scrubbing residue

Jan 29th...Rock, Concrete Stain, and Cabinets

Rock progress...

Here's a picture of the front porch. It's hard to tell what it looks like with all of the tools and rock scattered around. The pillars have Durock on them but no rock yet.

I tried to cut out all of the junk in this picture.

Here's the gable on the garage.

I finally remembered to take a picture of the garage door. We kinda guessed on the color when we ordered it, but I think it worked out great. What do you think?

Cabinet bases are built and ready to be stained in this picture...sorry about the quality. It was at night and I had my headlights on trying to get a picture.

Here's another picture of them after they have been stained. They still have to be sanded, puttied, and a bunch of other stuff that I don't know about yet. But I'm sure I will...

So...lets talk about concrete again. I know...I said I quit and I did. However, David and Mark (our contractor and his son) have taken over the project and we're just here for the little jobs. They tried out a little closet the other day and it looks great so far. It makes me just a little sick because all they did was sweep the closet and wipe it down with a wet sponge. They also tried a different acid stain. They used Quickrete instead of H&C that we used the other day. And they didn't dilute it with water. Maybe that had something to do with it. Anyway, I took one picture of our closet after they sprayed it. This is not what it will look like finished. Just what it looks like after it was just sprayed. You can actually see the bubbling from the acid reacting with the concrete. Oh...and just so ya know, it does burn your skin if you get it on you. Just ask Mark and Doyle!

I'll try to do a post later on the concrete stain progress with pictures so you can see what it looks like during each step. Wish us luck!

Sunday, January 24, 2010

Jan 24th...

We have heat and air installed. Yeah! Now we don't have to freeze our booties off when we go to the house. They are still working on the upstairs unit, but for now I'm so happy with heat that we don't have to add kerosene to and yell to be heard over (portable work heaters...). And mom, if you are thinking that you don't like the big, white PVC pipe that's coming out of the brick, yes, they will be painted so they'll be camouflaged. ;)


We have a few lights installed. Here's the lights in our bathroom. It's odd how the same paint color in the same room looks so different from different angles.


We have several plug-ins, light switches, and fire alarms installed. Here's a picture of a space that WOULD have been perfect for a pretty picture, but due to weird placement of the thermostat and fire alarm, I don't see how that's gonna work. Electric guys just don't think about important stuff like where to put pictures...hehe.


And last, but certainly not least, I need to post about concrete. Stained concrete. "Yeah, sure, anyone can stain concrete. It's easy!" PTHHHHBBBBBBB!!!!!!! Yeah, if you have done your own floor, feel free to come do mine because I QUIT! Let me explain. We got a sample from Sherwin Williams of "Black Coffee" acid etching stain and got after it yesterday. We chose Ty's bedroom and closet as our first attempt.
Step 1: Clean the floors so that they pass the "white glove" test. Okay. That took a lot of time. More time and agony than I wanted, but I'm still optimistic.
Step 2: Tape off the walls. Not bad, but doing a walking squat all the way around the room is getting old fast. Especially since I ran (I'm using the term ran loosely here...) bleachers yesterday and worked legs after that.
Step 3: Mix the stain 2 parts water: 1 part stain. Easy.
Step 4: Spray it on the floor with an ordinary garden sprayer. Easy.
Step 5: Wait for it to dry. So, we wait...and wait...and wait some more. Still not dry. We go eat because we are starving. We come back. Still not dry. We put the big box fan on it and wait some more...6 hours of waiting for it to dry. We give up and start cleaning the floor. (I guess we put it on a bit thick because it was only supposed to take 2-4 hours to dry.)
Step 6: We clean the floors again. And again. And again. And again. Until we can't clean any more. Again...walking squats have claimed my legs because I can hardly move.
Step 7: We QUIT! 10 hours is way too long to only get a bedroom and closet halfway finished. We still have to clean the floor some more and then seal it and wax it.
Step 8: We go to get Ty because Aunt Amanda and Uncle Michael have, again, graciously kept Ty while we worked today.
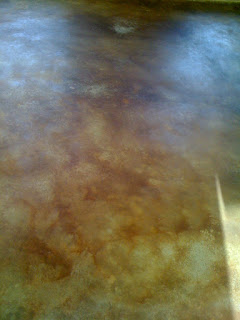
Want some pics? These were taken today after it had a chance to dry all night. We threw some water on it to get a better idea of what it would look like after the sealer and wax is on. Not bad. there are a few spots that didn't take the stain very good (not sure why because they soaked in the stuff for 6 hours...) but I really think the color and uneven texture is great. Exactly what I wanted.

Tuesday, January 19, 2010

Jan 19th...Still painting

We've got some painting projects finished...
The hall from the garage to the great room.


The workout room.


The upstairs is primed and the ceiling is painted. We only have to cut in and paint the walls.

The master bedroom is painted. This may look like a bathroom because of the boxes of tile and the bathtub, but really our bedroom has become a storage area for all of the bathroom stuff until it can be installed.


The plumbing is kinda in...the plumber messed up on the height of one of our shower heads so he has to come back and raise it up about 2 feet. Right now the shower head hits Doyle in the chin!!!
The tub base has been built and is patiently waiting the tub installation. This picture doesn't show the bathroom painted...
but let me assure you, it is.


Ty's room has the gray paint done. All it needs now is the big red stripe. We tested the red on the wall to see if we liked it.


The half bath, laundry room, guest bedroom, Ty's bath, the hall by Ty's room, the tiny hall by our room, and all of the closets have been painted but I didn't take pictures of them.

Door knobs are mostly in. We have two pocket door latches to put in. Speaking of pocket doors...they are finally installed with the trim puttied, sanded, caulked, primed, sanded, painted, sanded, and finally...painted a second time. Sounds like a lot of work, huh? Yeah, it took us forever to do every single window and door plus trim in the house. If I never see a sanding pad again, it will be too soon! Here's the picture of the door knobs.

Outside, the soffits are getting their clear coat of stain and one set of stairs is finished off of the deck. The bigger set of stairs is being put on hold for now...dang budget!

Also, the pillars are getting boxes built for the rock bases. (Don't worry...I know they look little now, but I've been assured that they'll look more substantial when the durok and rock goes on.)


And...here's the best picture yet! ROCK!!!! Yep...the rock I fought so hard for finally made its first appearance today. And I love it!


Sunday, January 10, 2010

Jan 10th...Paint and Tile

There have been lots of things happen since my last post, but I haven't taken many pictures. Sorry...I'll try to take more later. Here's what I do have...

We painted the kitchen and dining room the red. Love it!
We also painted our bedroom (jute brown) and closet (bagel) and the living room and foyer (smokey topaz).

We picked up our tub from Home Depot (finally!). It was a huge ordeal that should have never happened. Basically the tub was supposed to be a stock item...it wasn't and we had to wait on it to be shipped in and deal with people who told us what we wanted to hear instead of the truth. That's the nicest way I can put it and I'll leave it at that. To their credit, though, they did give us $50 off for our trouble and then I asked them to match a 10% off coupon that I had from Lowe's...and they did.

We also picked up our tile!!! Lowe's had this great slate that will look great in our shower. The large tile will go on the walls and the small tile will go on the ceiling. There are also some small accent tiles (no pic) that will go around the shower about eye level. Oh, I also got to use my 10% off coupon!

Saturday, January 2, 2010

Jan 1st...Happy New Year!

Happy New Year!

Happy 10th Anniversary! December 28th marked 10 amazing years for us.
Surprise ceremony to renew our vows...check. Friends and family there to support us and show their love...check. Babysitter...check (Thanks Amanda!). Getaway to the Lodge...check. Covenant marriage...check. My wonderful husband...priceless.
Window boxes were built and primed and ready to put in. I forgot to rotate the picture before I uploaded it...sorry.

Stairs on the back deck are getting worked on.

Lots of shopping. Tons of shopping. So much shopping that I am, in fact, sick of shopping. And for those of you who know me well, that is almost impossible. Over the break, many people have shopped with me and without them, let me say that I wouldn't have made it. So, thanks, Laura, Stephanie, and Doyle. I have been waiting so long for the days that I could shop for lights and faucets and door knobs. And now that its time, I am so overwhelmed that I can't make decisions. Thank goodness for the massage chairs at National Home Center because they gave us a good break from the shopping and let us relax (that is until the guy came and bought one and only left us one!).

Here's some lights I found at Home Depot for our bathroom. There will be 2 sconces on one vanity and the light bar over the other one.


I really want a nice whirlpool tub in my bathroom so I can take long relaxing baths in a huge tub and watch some television (yes, there will be a flat screen mounted to the wall above the tub!) or read and have an adult time out. So, I was worried about going over budget with the one I picked out at Lowe's and I noticed Home Depot had a tub I really liked. So, I started looking at the measurements to see if it was narrow enough. Yep. Then I looked to see if it was 6 foot and it was! (Hardly anyone carries a 6 foot tub in stock...special order $$$.) So I asked the salesman why the great price ($749 vs. $1200 at Lowe's) and he said that because it is a stock item and ALL Home Depot stores carry them, they can buy it in bulk and sell it at a much better price. If we had to special order this tub, it would be over $1000. Woo Hoo! Tub decision made. I was with Laura and Stephanie on this shopping trip in Fayetteville/Rogers/Springdale, so Doyle and I could just go pick this baby up in Ft. Smith. So Monday, Doyle and I go to Ft. Smith to do some more shopping and guess what? Not ALL Home Depot stores carry this tub in stock. Talk about upset!!!!!! But, the sales manager made it up to us by transferring the tub to Ft. Smith and selling it to us for $699. It will be here Monday.


Drywall is hung and waiting for more mud upstairs.
Playroom.
Bathroom
Man-nest

Did you know that every door and window have to be puttied, sanded, and caulked before they can be painted? You did? Okay...well, have you ever done it? Have you ever taken those little sanding pads and sanded every square inch of all 17 doors and their frames? How about 19 windows? How about caulking? Sounds simple, right? Sure, no big deal. You just take the gun and squirt some caulk around the edges. Nope! You gotta wet your finger (remember it is 23 degrees outside) and smooth it out so it looks really good. Not only that, but you've gotta do every crack and miter. Talk about some sore and chapped fingers...but man does it look good!


Ty was such a big help sanding...


The weather has slowed down the brick progress, but the brick layers have been working despite the cold the last couple of days. The gable on the left is awaiting rock (and so is the porch and other gable). The peak above the garage is finally complete.


Our Home in the Woods

Our Home in the Woods